


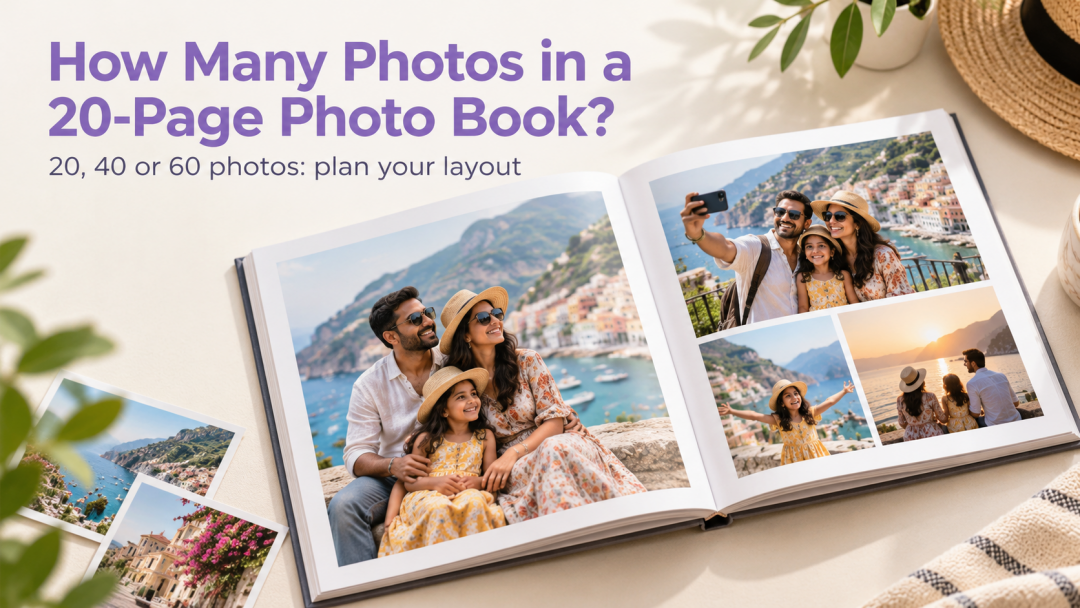


Start with about 40 photos for a 20-page photo book. That gives you an average of two photos per page, with room to make a few favourites larger. Choose 20 photos for a quieter book with one picture on each page, or plan 60 if you want more small groups and collages.
These are layout suggestions, not upload limits. The right number depends on the design you choose, the space you want for captions and how large you want faces and details to appear.
If you are preparing pictures for photo album printing, choose a photo count first. It makes sorting your gallery and choosing a layout much easier.
A quick guide to 20 40 and 60 photos
| Photos inside the book | Example allocation across 20 pages | Choose this when |
|---|---|---|
| 20 | One photo on every page | You want each picture to have its own space |
| 40 | Four pages with one photo, twelve with two and four with three | You want a mix of larger pictures and small groups |
| 60 | Four pages with one photo, eight with three and eight with four | You want to include more moments in a fuller layout |
For the examples below, each selected photo appears once across 20 inside pages. The cover is outside these photo counts. Captions share space with pictures; there are no separate title-only or blank pages in the plans.
Confirm how your selected product counts its cover and inside pages before ordering. If you reserve a page just for a title or dedication, you will have fewer pages available for photos.
Pages sheets and spreads mean different things
A page is one side of a sheet. Ten sheets have twenty sides, or twenty pages. A spread is two facing pages viewed together.
Photojaanic’s inspected hardcover specifications describe a starting book as 10 sheets, or 20 pages. The diagrams below show individual numbered pages, rather than physical left-and-right spreads. Follow the selected template’s actual page order, cover areas and guides when you design.
All three diagrams are original planning illustrations. They show photo spaces, not photographs of a finished book or verified Photojaanic editor presets.
Plan one with 20 photos
Choose this plan when you have a short, carefully selected story: a few days away, a birthday, or twenty family pictures you want to keep together.
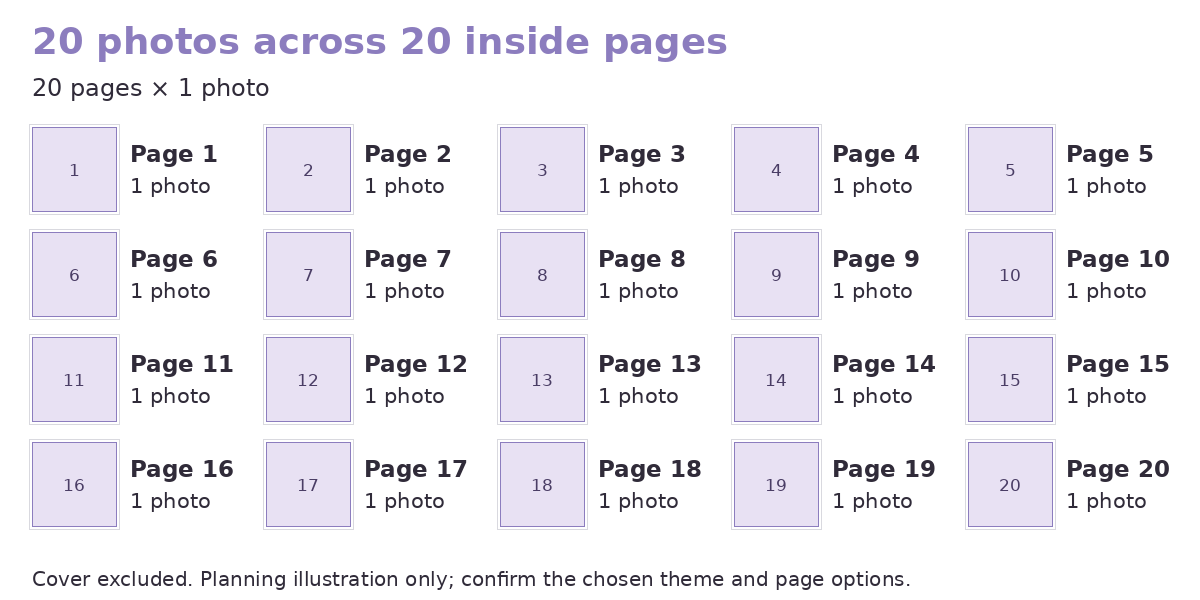
The count is simple: 20 pages × one photo = 20 photos. Add a short caption where it helps explain the moment. A single-photo page can have space around the image; it does not need to be an edge-to-edge enlargement.
Use a mixture of close portraits, wider scenes and small details. Twenty near-identical group shots can feel repetitive even when the layout is spacious. Keep the strongest version of each moment and use the next page to move the story forward.
This plan also gives you fewer crop decisions to make. Check each picture at its intended printed size before giving it a whole page.
Plan two with 40 photos
If you are unsure where to start, try this plan. It leaves four pages for individual favourites and uses the remaining pages for pairs and small sequences.
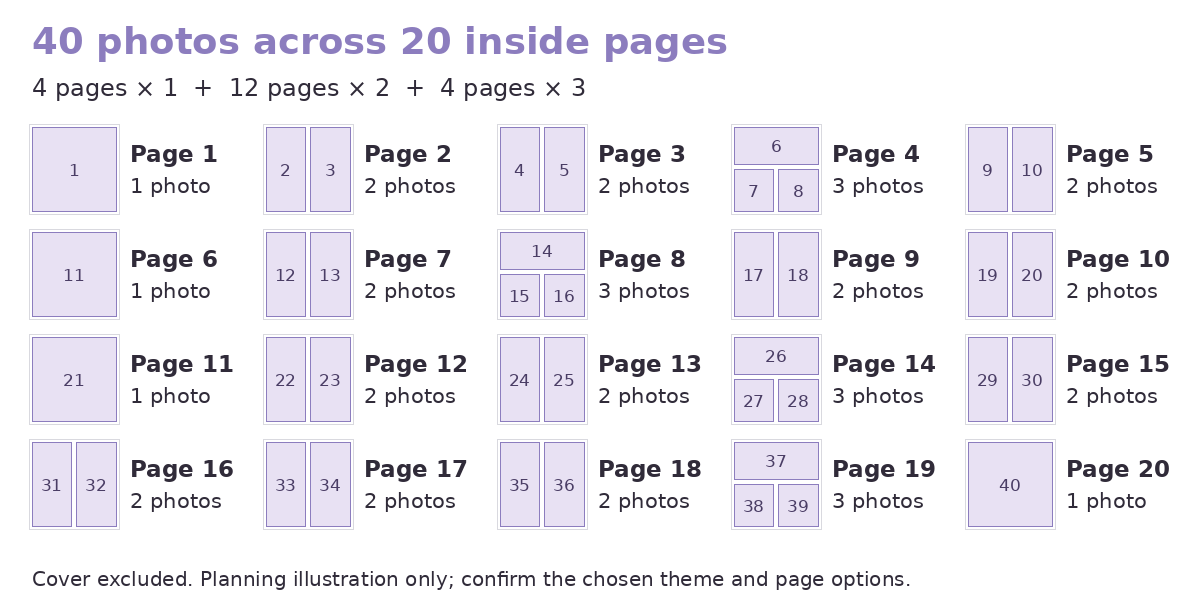
The allocation is four single-photo pages + twelve two-photo pages + four three-photo pages = 40 photos.
In this example, pages 1, 6, 11 and 20 each have one photo. Pages 4, 8, 14 and 19 each have three. Every other page has two.
For a family holiday, use the opening picture to introduce the place. Pair a wider scene with a closer detail, then group three related moments where they make sense together. Finish with a favourite photograph rather than whichever file happens to be last in your phone gallery.
You can also organise the book into four sections of five pages. This example puts ten photos in each section. A birthday book might cover getting ready, guests arriving, the celebration and the final family pictures. The sections do not need separate title pages; a small heading can sit beside the photos.
If this mix suits your shortlist, explore the 20-page hardcover options and check the layouts available in your preferred theme.
Plan three with 60 photos
Use this plan when the small moments matter alongside the main pictures: relatives at a celebration, different parts of a trip, or a series of baby milestones.
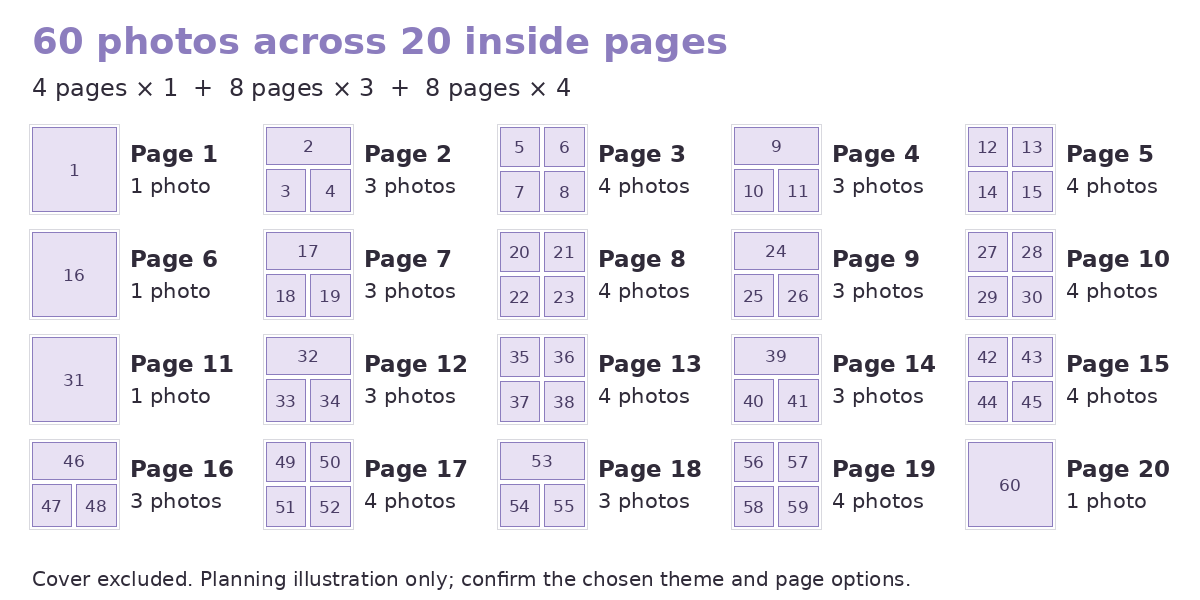
The allocation is four single-photo pages + eight three-photo pages + eight four-photo pages = 60 photos.
The single-photo pages are again 1, 6, 11 and 20. The other pages alternate between three and four pictures as shown in the diagram. Each five-page section contains fifteen photos.
Group pictures that belong together. Three images of a child opening a present can read as a sequence. Four unrelated pictures with very different lighting and colour may compete for attention on the same page.
Check the size of faces in the smaller spaces. A photograph of twenty people needs a different treatment from a close-up of one person. If an important group becomes difficult to see, give it more room and move a detail shot elsewhere.
Which book size should you choose
The number of photos does not determine the book size on its own. Think about the spaces each picture will occupy.
An 8×8-inch book can work as a square format for family pictures and short captions. An 8×11-inch format gives a different page shape to arrange around. Compare your selected theme’s actual orientation and photo spaces before deciding; avoid assuming that every image needs to fill a page.
The custom hardcover photo book range lists a 20-page starting point. The inspected Classic White theme includes 8×8, 8×11 and 12×12-inch size buttons. Check the chosen theme for its current page options before starting.
If you prefer a layflat photobook album, check the starting page count by size. In the inspected Design Your Own theme, 6×7.5 inches starts at 20 pages, while 9×12, 12×12 and 12×15 inches start at 40 pages. A larger layflat option therefore needs a different page plan from the twenty-page examples here.
For a fuller sixty-photo book, review a few of the busiest pages at the size they will be printed. If they feel cramped, reduce the count, choose another layout or consider more pages where the product supports them. Check the revised total before ordering.
How to choose your photos without getting stuck
Create a shortlist folder before you open the designer. Start with the moments the book needs to tell its story, then add supporting pictures.
First, remove accidental duplicates and choose between similar frames. Keep the one with the clearest faces and the expression you prefer. Then check whether you have a useful mix of people, places and details.
Arrange the shortlist in the order you want someone to read it. For a trip, that may be day by day. For a baby book, it might be by milestone. For a family event, group the pictures around what happened rather than which relative sent them.
Keep a few alternatives in a separate folder. If a favourite crops awkwardly in the selected layout, you will have another option ready. Choose a layout with fewer photo spaces rather than filling a box with a weak picture.
Use original image files where possible. Check the quality of photos saved from a chat or screenshot before enlarging them. A higher photo count does not make small, blurry files suitable for every printed space.
What changes if you want a title page
A title-only page leaves nineteen inside pages for photos in this plan. Forty photos across nineteen pages means a little over two pictures per photo page on average. You could put two pictures on eighteen pages and four on the remaining page, giving forty in total.
That calculation is a starting point. Move pictures around to suit the story and the available layouts. If several pages need long written memories, allow more space for text and reduce the photo count or consider additional pages.
Check these details before ordering
1. Count the inside pages available for photographs after any blank or text-only pages.
2. Confirm the size and starting page count of the selected product and theme.
3. Match your shortlist to the number of photo spaces you actually use.
4. Review faces, captions, crops and template guides on every page.
5. Check the cover separately, including the title and any image reused from inside.
6. Confirm the final quantity, price, applicable charges and delivery estimate before payment.
The product pages offer a Start Customizing button after you choose a theme and size. Use the diagrams as a plan when selecting or adjusting available layouts. They are not a promise that the editor contains identical presets.
Questions about photo counts
Can I make a 20-page book with only 20 photos
You can plan one photo per inside page, as the first example shows. Confirm that your chosen theme supports the arrangement you want. Photojaanic’s FAQ says the number varies by product and theme, so check the design rather than treating a general recommendation as a fixed requirement.
Is forty photos a requirement
No. Forty is the starting suggestion in this guide. Twenty allows more space per image, while sixty uses more grouped layouts. Choose according to the story and how comfortably the photos fit.
Do I need a different photo for the cover
You can plan to reuse a favourite from inside or select an additional cover image. The twenty, forty and sixty counts in this guide exclude the cover. Confirm the actual cover and page setup in the chosen design.
Is a 20-page book the same as a 20-sheet book
No. Twenty pages are twenty sides. Twenty sheets have forty sides. The inspected hardcover specification equates ten sheets with twenty pages.
Should I put the same number of photos on every page
You do not have to. The forty- and sixty-photo examples mix single-photo pages with grouped layouts. Leave more room for pictures with many people or important details.
Start with the shortlist you already have
Choose the twenty-, forty- or sixty-photo plan closest to the pictures you want to keep. Sort them into a rough sequence, then explore the photo album book range and choose a design that suits your story. Review the page options and every layout before ordering.




Be the first one to comment