


How to Print a Newborn Album Sample for Your Photography Studio
A newborn studio sample album is one printed book made with your own work. Choose the format you plan to sell, include photos that test skin tones and cropping, and order one copy before offering it to clients. When it arrives, check the same images you inspected in the editor. If the book looks right, you can show families exactly what their package includes.
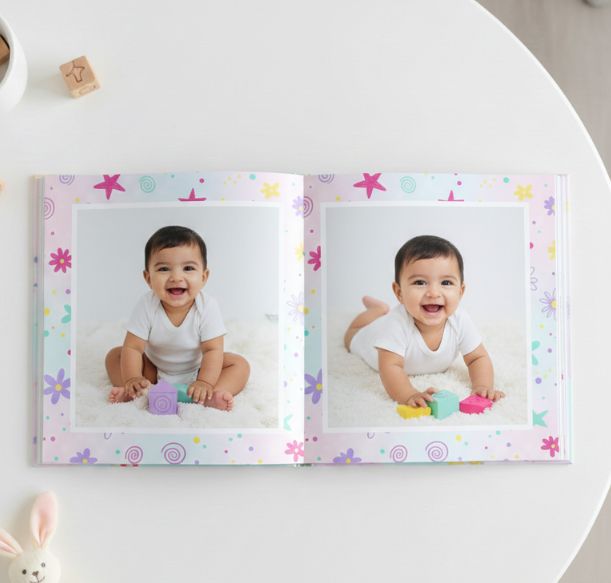
Baby Minimal Hardcover shown open in the Photojaanic product gallery.
Your studio sample shows what happens to the photographs your studio actually delivers: the pale wrap you use on most shoots, the shadow beside a sleeping baby’s face, and the family portrait that needs room for everyone. Those are the pages to test.
Table of Contents
Choose the photos that will tell you something
Start with one recent gallery that reflects your usual work. Add a few images from a second session if the first does not include a lighting setup you often use. Use your own finished edits and make sure your permission covers a studio display copy. Skip identifying details such as full names and birth dates unless you have specific permission to include them.
| Photo to include | What it checks |
|---|---|
| A close portrait with a pale wrap | Look for colour shifts on cheeks and see whether the wrap still has texture next to bright skin highlights. |
| A face in soft side light | Check that the darker cheek and shadow beside the nose retain detail without looking muddy. |
| A parent and baby in the same frame | Look for whether both skin tones still feel consistent with your finished edit. They should not be forced to match. |
| Hands, feet or eyelashes in a close frame | Check detail at the actual printed size. Pick a file you already know is sharp. |
| A wide family portrait and a tighter portrait | Use the wide shot to check page edges and the fold. Use the tighter one to check how a crop affects the face. |
Sample 20-page plan: Pages 1–2 introduce the session. Use pages 3–6 for light portraits, 7–10 for shadows and detail, 11–14 for parent and family photographs, 15–18 for two crop or layout comparisons, and 19–20 for your closing images. These are inside pages; design the cover separately. You can repeat one image on purpose if you want to compare two placements.
Choose the album you intend to offer
Match the sample’s size, paper and binding to the package clients will buy. A small book may be enough to show your editing style, but it won’t tell you how a larger spread trims or opens. If you sell two formats, test the one you plan to recommend most often first.
| Photojaanic option | What the product page lists | What to test with it |
|---|---|---|
| Baby Minimal Hardcover | Lustre Silk paper. Starts with 10 sheets, or 20 pages. The product lists an 8 × 8-inch size. | A cover portrait, square crops and pages with one or two pictures. |
| Baby Bump Layflat | Premium Art paper. The 6 × 7.5-inch size starts at 20 pages; 9 × 12, 12 × 12 and 12 × 15 inches start at 40 pages. | A wide family portrait across the fold and whether the planned images feel right at that size. |
See the Baby Minimal Hardcover and Baby Bump Layflat listings, or compare Photojaanic photo book formats if you want a different cover design. Check the exact configuration before building your file. These are examples of standard photo books you can choose for a studio copy.
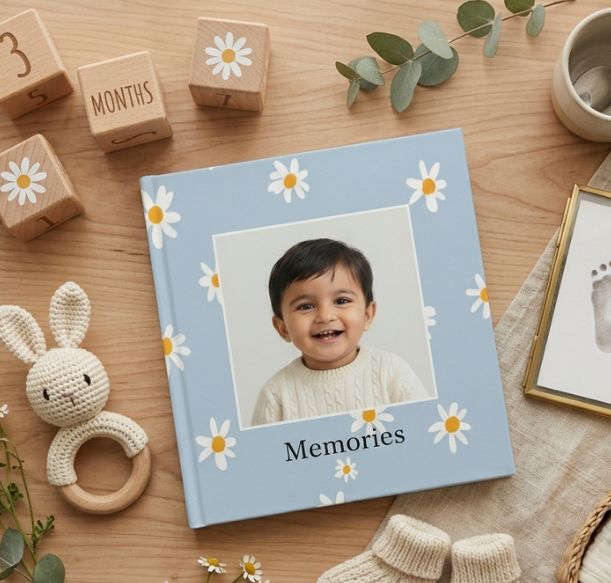
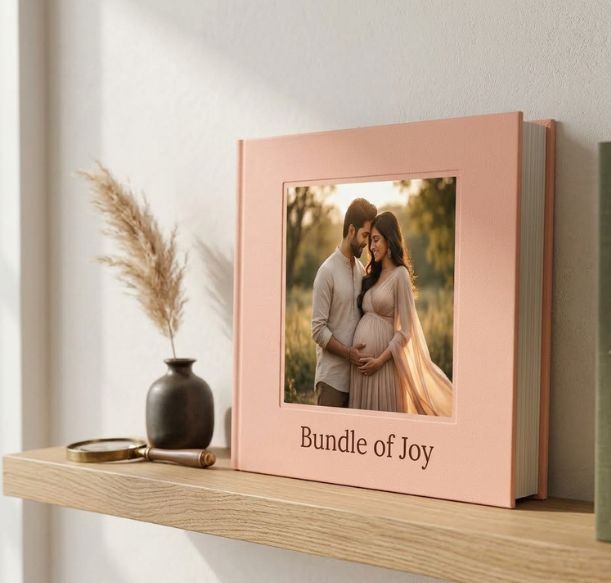
Baby Minimal Hardcover • Baby Bump Layflat cover
Check colour and cropping before ordering
Colour: Open your finished edit on the screen you normally use for colour work. Pick a reference frame with visible face detail and a neutral object, such as a white wrap you know is neutral. Check highlights, shadows and any cast you did not intend. A white-looking wrap in warm light does not have to print pure white. If the lab provides a profile and instructions for your exact paper and product, use them to soft-proof the file. Keep the finished edit separate from any print-specific adjustment.
Cropping: Inspect the cover, every page and any two-page spread in the editor. On a cover, keep the face and lettering away from the wrap and hinge areas shown by the template. On inside pages, take extra care with fingers at the edge and eyes near the fold. Use the guides for your selected size. If moving the image to fill the frame cuts off a hand or a face, choose a different crop or make the image smaller with a border. Check the final preview again after you move it.
If a picture looks soft after a tight crop, go back to the full-resolution edit. Use the photo resolution and print-size guide if you need to decide whether a smaller frame will help. The preview is useful for composition; it cannot confirm how the paper will render colour or how the finished binding will open.
Order one copy and inspect it under neutral light
Before checkout, confirm your selected format, size, paper or finish where applicable, page count and quantity of one. Check the delivery estimate and final total, including taxes and shipping if applicable. For studio options or help confirming a configuration, visit Photojaanic printing for newborn photographers. Use the current product and checkout details when deciding what to order.
After the book arrives, look at it in indirect daylight or consistent neutral lighting. Compare it with the files you actually uploaded on a reasonably calibrated screen at a sensible brightness. Prints reflect light, so judge whether tones and detail look right for the work you deliver. A screen and paper do not have to look identical.
| Check on the printed copy | What to record |
|---|---|
| Skin tones and pale wraps | Compare several frames. If one changes noticeably, check that file and its lighting. If several shift in the same direction, check the viewing light and export settings before editing again. |
| Edges and cover | Look for fingers, lettering and other details you expected to see. Compare the result with the saved preview and its safe areas. |
| Centre fold | Open the book on a flat surface. Check whether the fold interrupts a face, a caption or another detail you wanted to keep together. |
| Sharpness and finish | Check the close portrait at a normal reading distance. Record what you ordered and whether the paper and finish suit the sample you want to show clients. |
Write down the order reference, affected page and what you would change. Keep the submitted files, preview and notes together. If you need help understanding a result, share those details with the print team before making a new order. When the book works, put it on your consultation table. Show families the exact size and binding in your quote and open to the spread that best represents your work.
Questions photographers ask
How many copies should I order for a first studio sample?
Order one in the configuration you want to offer. Review that copy before ordering a second display book or using the same setup for a client.
Can I use client photographs in my sample?
Use work you own or have permission to print and show in that setting. A studio display, a social post and a copy sent to a client are different uses, so check what the permission covers.
Will the sample look exactly like my screen?
Expect some differences because a screen emits light and paper reflects it. Compare under neutral lighting and check whether skin tones, highlights and shadows still look right on the page.
Can one sample tell me how a different paper or format will print?
It shows the configuration you actually ordered. Test a different paper, finish or size separately if the change matters to what you plan to offer.
Once the sample is ready, use the studio album proofing checklist when you prepare and approve the first client order.




Be the first one to comment